• Skip to primary navigation
  • Skip to main content
  • Skip to primary sidebar

Partial Ingredients

Everyday Style & Recipes. Est. 2010

  • Recipes
  • Fashion
  • Press
  • Image Copyright Information
  • Privacy Policy
  • Contact

recipes

Moscow Mule Cocktail

January 17, 2018 by The Partial Ingredients

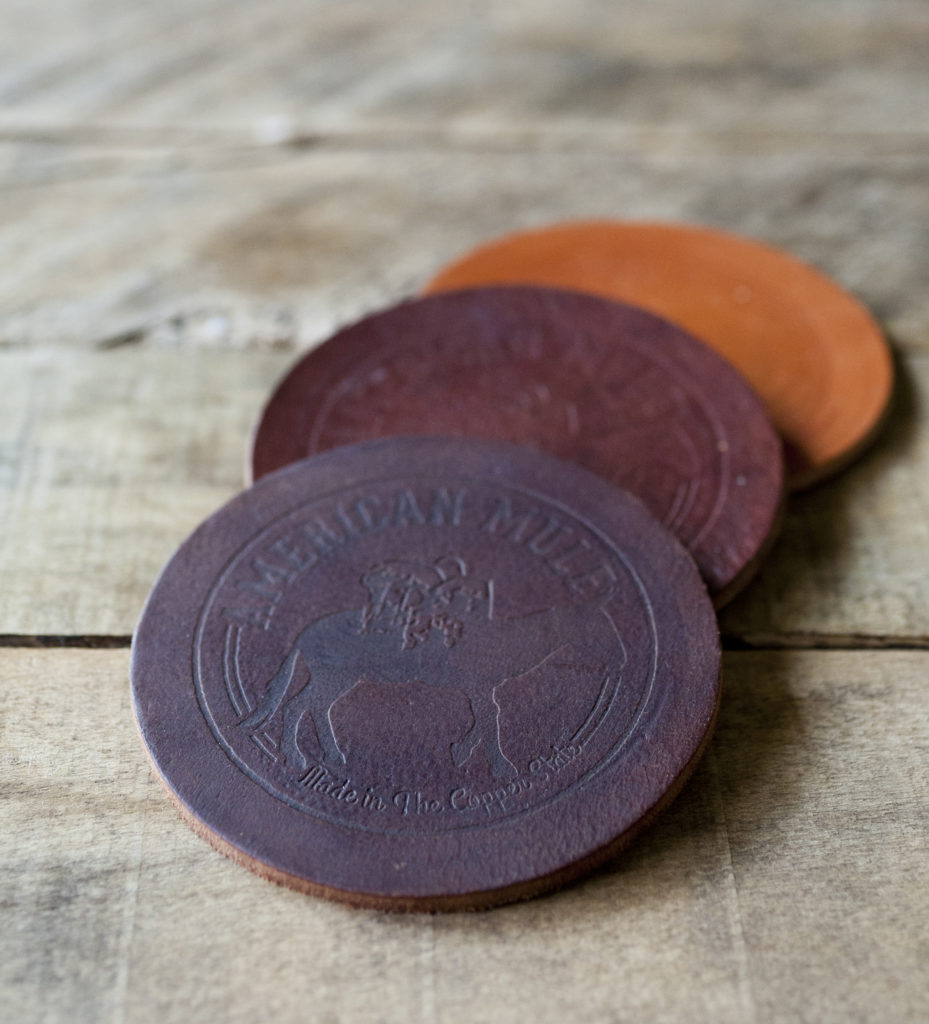
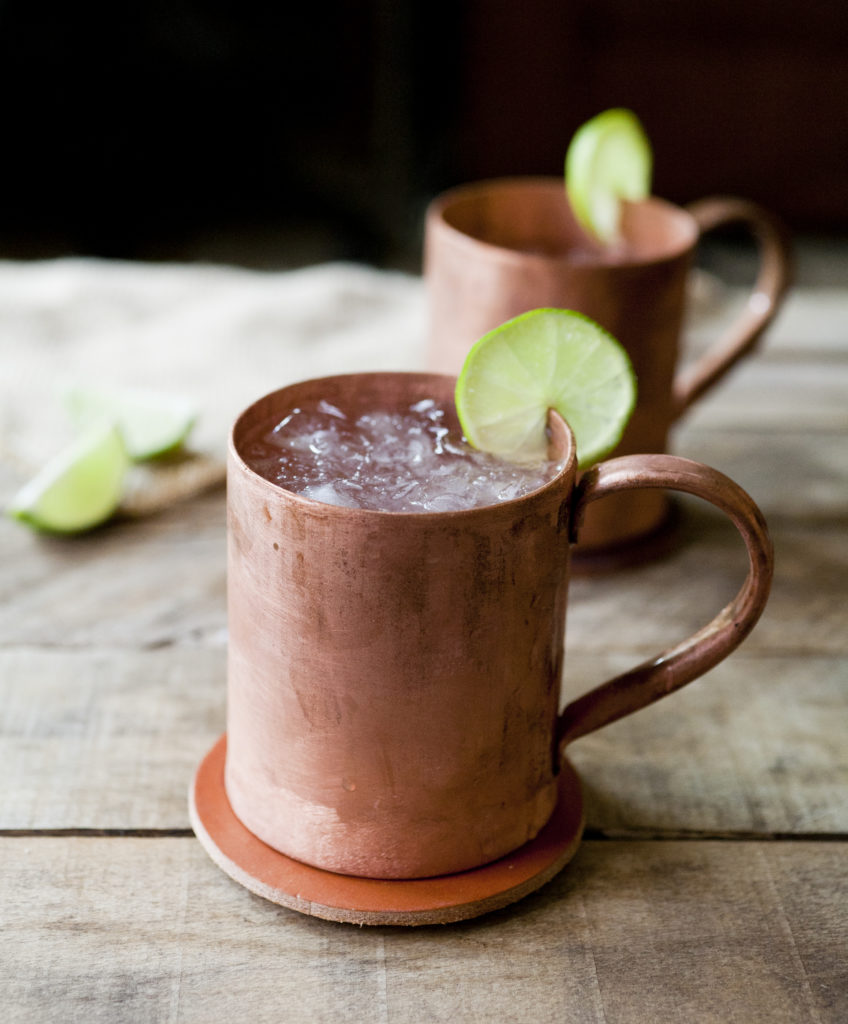
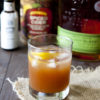
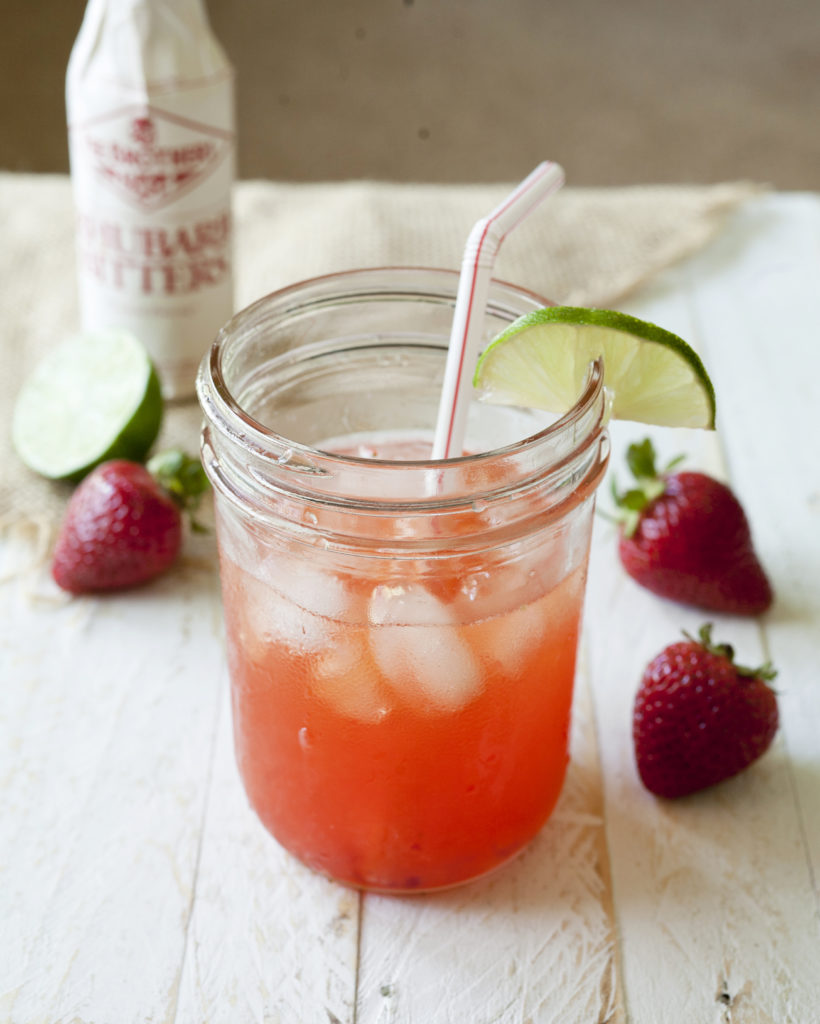
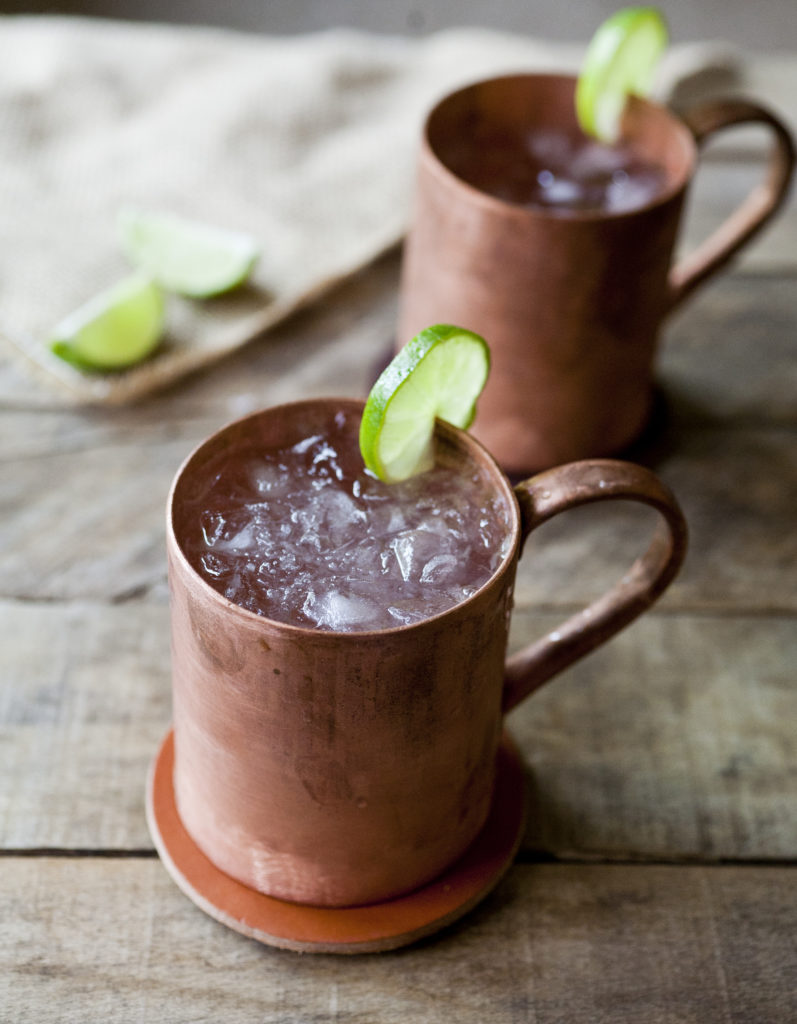
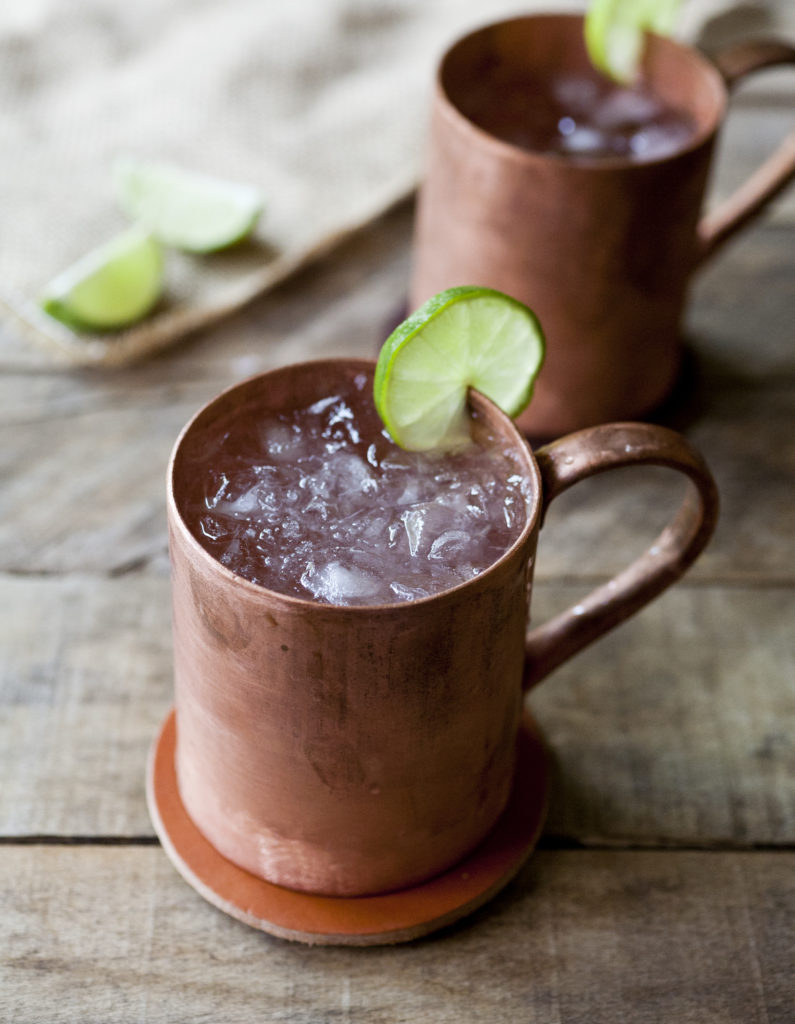
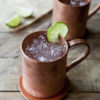
Moscow Mules have been one of my favorite cocktails for a while now. The blend of spicy ginger and tangy lime is a great flavor combination! The only problem is I never had the “perfect” copper mugs to serve them in. I know it kind of seems silly, like c’mon, right? You can totally serve a Mule in a regular glass, but there is something nice about a legit copper mug for Moscow Mules. Anytime I ordered one at a restaurant, they were always served in the prettiest copper mugs.  Over the holidays, I received these two American Mule copper mugs and leather coasters to finally serve and enjoy Moscow Mules properly! You can read more about them here.

I was super excited to try them out and, you know what, I swear it improved the flavor! I will say though there could be something to it and I might not be crazy. These mugs are made from solid copper and they got seriously cold and stayed that way for much longer than glass. The ice took longer to melt/dilute the drink which helped preserve the flavors over time. It reminded me a lot of the milkshakes I ordered as a kid and the “extra shake” was served in those big stainless steel containers. I’m sure they were served that way to preserve the milkshake better and the same logic goes for these mugs. Why this is important for Moscow Mules specifically I do not know. I’m sure it would work just as well for other cocktails, especially the ones like Gin and Tonics that require a fair amount of ice. Since there’s so few things going on with this cocktail, the ingredients are very important–especially the ginger beer. I tend to prefer ginger beers with more bite than sweetness. I have experimented with a couple different brands and I’ve come to like Fever Tree or Goslings.  Crush the ice and slice a few fresh limes and you’re good to go!

Print

Moscow Mule Cocktail

A tangy and refreshing classic cocktail recipe!

Course Drinks
Total Time 5 minutes
Servings 1 Drink
Calories 250 kcal

Ingredients

  • 2 oz. Vodka
  • 4 oz. Ginger Beer I like Fever Tree or Goslings
  • 1/2 lime juice
  • 1 slice of lime for garnish
  • crushed ice

Instructions

  1. Squeeze the lime juice into a Moscow Mule mug.

  2. Add crushed ice, then pour in the vodka.

  3. Fill with ginger beer. Stir and adjust the amounts of lime juice, ice or ginger beer. Garnish with a lime wedge.

Eggnog Pumpkin Pie

December 3, 2017 by The Partial Ingredients

Ah, eggnog and pumpkin pie! The most classic of holiday foods. Usually consumed separately, these two can be gloriously joined into one dessert–an eggnog pumpkin pie! How delicious is that? It’s actually a super easy substitution because one of the usual ingredients in a pumpkin pie is heavy cream. And that isn’t too far away from eggnog so it’s a pretty easy pairing. Now to figure out a way to get a little bourbon into the mix…hmm…well anyways!

This recipe is perfect for the holidays and I seriously recommend making the butter crust. You will NOT be disappointed in the least. Just follow the instructions and you will have an incredibly flaky crust on your hands. I know everyone has an electric mixer these days but I actually find better success at a pie crust when I make it by hand, the slow and tedious way. Breaking up ice cold butter is no picnic but I’ve heard it winds up being a flakier, butterier (is that a word?) crust. It’s all about those cold butter clumps in the dough. The only tweak for this recipe as opposed to a regular pumpkin pie is a little bit less sugar since the eggnog already has some of that covered. And that’s it! Just remember to reserve a few hours of your time to get the crust dough nice and chilled so it can be properly rolled out before baking. Serve with a dollop of freshly whipped cream or vanilla ice cream!

Print

Eggnog Pumpkin Pie

An easy and delicious pumpkin pie recipe made with eggnog and an all butter crust.

Course Dessert
Cuisine American
Prep Time 2 hours
Cook Time 40 minutes
Total Time 2 hours 40 minutes
Servings 1 Pie
Calories 350 kcal

Ingredients

  • 2 cups pumpkin puree canned
  • 1 1/2 cups eggnog
  • 1/2 cup brown sugar packed
  • 1/4 cup granulated sugar
  • 1/2 tsp salt
  • 2 eggs plus the yolk of a third egg
  • 2 tsp cinnamon
  • 1 tsp ground ginger
  • 1/4 tsp ground cloves
  • 1/4 tsp ground cardamom
  • 1/2 tsp lemon zest
  • 1 prepared pie crust (recipe below)

Pie Crust

  • 1 1/4 cups all-purpose flour plus extra for rolling
  • 8 tbsp unsalted butter cold, cut into 1/2 inch cubes
  • 1/2 tsp salt
  • 1/2 tsp granulated sugar
  • 4 to 6 tbsp ice water cold

Instructions

To make the pie crust

  1. Cut the sticks of butter into 1/2-inch cubes and place in the freezer for at least 15 minutes (up to an hour is best).

  2. Combine flour, salt, and sugar. Add butter and mix until it resembles coarse meal. Add water one tablespoon at a time, mixing until it just begins to clump.

  3. Remove dough and place on a clean surface. Carefully shape into a disk shape. Sprinkle with a little flour on all sides. Wrap in plastic wrap and refrigerate for an hour.

  4. Remove the dough from the refrigerator and let sit at room temperature for 5-10 minutes. Sprinkle a little flour on top and then roll it out with a rolling pin on a lightly floured surface until it reaches 12 inches across and 1/8 of an inch thick. Place onto a 9-inch pie plate.

To make the pie

  1. Preheat oven to 425F.

  2. Mix sugars, salt, spices and lemon zest in a large bowl. Beat the eggs and add to the mixture. Add the pumpkin puree and eggnog. Whisk all together until well incorporated.

  3. Pour into prepared pie shell and bake at 425F for 15 minutes. After 15 minutes reduce the temperature to 350F. Bake 40-50 minutes, or until a knife inserted near the center comes out clean.

  4. Let cool for 2 hours.

Roasted Chicken, Rice & Vegetable Soup

November 5, 2017 by The Partial Ingredients

It’s soup season which also means it’s cold and flu season as well–oh joy! But it’s alright, this recipe will help get us through it. This recipe’s feature is the roasting chicken. Roasting a whole fryer chicken in the oven at a low temperature results in fall apart tender meat every time. The rest of the soup ingredients cook alongside the roasting chicken at a low temperature until both are ready to be combined at the end. It’s a match made in soup heaven!

There is a hefty dose of veggies in every bowl, namely bell peppers, spinach and carrots to name a few. The balsamic vinegar adds a hint of tangy and sweet to the broth. Use homemade chicken or vegetable stock for this, especially if you’re feeling under the weather as it will help kick your cold faster. I used brown rice but you can substitute in noodles, quinoa, pearl couscous or just a crunchy baguette for dunking. Whatever floats your boat–it will likely be delish. As always, I like to cook my starch separate (especially if it’s rice) and add a serving to each bowl just before eating. It really helps preserve that valuable broth for dinner the next day. If you miss the flavor of the soup in the rice, cook the rice in chicken stock instead of water. I garnished each bowl with shaved parmesan from the rind but a savory romano cheese would be perfect as well.

Print

Roasted Chicken, Rice & Vegetable Soup

A perfect cold weather chicken soup full of comforting veggies and flavor.

Course Main Course, Soup
Prep Time 30 minutes
Cook Time 2 minutes
Total Time 32 minutes
Servings 6 Servings
Calories 450 kcal

Ingredients

For the chicken:

  • 1 whole chicken 4-5 lb.
  • 1 tbsp Lemon Pepper seasoning
  • 2 tsp garlic powder
  • 1 tbsp olive oil

For the soup:

  • 3 tbsp butter
  • 1 yellow onion chopped
  • 3 bell peppers yellow or red, diced
  • 5 carrots diced
  • 5 celery diced
  • 1 tbsp thyme dried
  • 1 tbsp oregano dried
  • 1 tsp red pepper flakes
  • 4 cloves garlic minced
  • 5 handfuls fresh spinach diced
  • 15 to 16 cups chicken or vegetable stock
  • 3 cans tomato paste 6 oz. cans
  • 2 tsp Lemon Pepper seasoning
  • 1 tbsp balsamic vinegar
  • 6 servings cooked brown or white rice 1/2 cup dry = 1 serving
  • 6 servings shaved parmesan for garnish
  • salt and pepper to taste

Instructions

  1. Preheat the oven to 325F. In a glass pan, add the chicken and cover in olive oil, lemon pepper seasoning, and garlic powder. Cover with foil and cook 2 to 2 1/2 hours or until the internal temperature reads 170F.

  2. While the chicken is cooking, add butter, onions, carrots, celery, bell peppers and garlic to a large 6 qt. stock pot. Cover and cook until softened about 7 minutes.

  3. Stir in the oregano, thyme, pepper flakes, lemon pepper seasoning. Cook 1 minute until fragrant.

  4. Stir in the balsamic vinegar and tomato paste. Cook another minute until the paste has melted.

  5. Stir in the broth. Turn up the temperature until the soup reaches a low simmer and then turn it down to the lowest heat setting.

  6. You can add the spinach now or you can wait until the last half hour of cooking. I prefer adding it in at this stage. Cook for about 2 to 2 1/2 hours. Taste and adjust seasoning.

  7. During the last 15 minutes, cook the rice as directed on the package.

  8. When the chicken is done, remove from the oven and let rest for about 10 minutes.

  9. When the chicken has cooled, shred the meat with a pair of forks and remove the skin.

  10. Combine the chicken with the soup, stir to combine. Cook another 5 minutes or so.

  11. Ladle a serving of rice into individual bowls and pour in the soup, stir to combine. Garnish with parmesan or romano cheese.

Save

Save

Black Walnut & Bourbon Spiced Apple Cider

October 7, 2017 by The Partial Ingredients

‘Tis the season for one of my favorite cocktails–spiced apple cider with a bit of a kick to it.  This cocktail is super simple and delicious. I bet it would taste great warmed up but I haven’t tried it out yet. The secret to giving this drink a proper finish is the combination of bitters. Of course there’s angostura in the mix but the unique flavor actually comes from the black walnut bitters. I haven’t seen it sold in stores but you can find it online (I’d recommend checking out Amazon or Bevmo).

In addition to the spiced seasonal flavor that the apple cider and angostura bitters provide, I love the nutty, sweet flavor from the black walnut bitters. If you aren’t able to find it around, just the angostura and cider can suffice. It probably won’t have the same complexity or depth of flavor though. You can also do your own experimenting if you have other bitters on hand. I’d imagine orange or cardamom bitters would be great in this drink too!

Print

Black Walnut & Bourbon Spiced Apple Cider

A delicious autumnal beverage with spiced apple cider, bourbon and black walnut bitters!

Prep Time 5 minutes
Servings 1 Cocktail
Calories 250 kcal

Ingredients

  • 2 oz. Bourbon or Rye Whiskey
  • 4 oz. Spiced apple cider I used Trader Joe's
  • 2 dashes Angostura bitters
  • 2-3 dashes Fee Brother's Black Walnut bitters
  • 3-4 ice cubes
  • 1 twist of lemon or orange peel

Instructions

  1. In a rocks glass, add the bourbon or rye whiskey.

  2. Add a few dashes of each bitters and give the glass a stir.

  3. Add the ice and then the apple cider and give the glass another stir.

  4. Taste and adjust ingredients as desired. Garnish with a lemon or orange peel.

Save

Save

Save

Save

Spicy Sriracha Garlic Chicken & Rice

September 9, 2017 by The Partial Ingredients

For everyone who has a sriracha addiction, you know that you can’t really go wrong with Sriracha. I mean, sometimes the “experiments” you do with this stuff will probably make the average person go, ‘you put that on what??’ Yep, sriracha goes with pretty much everything. The ones who are in the know understand where I’m coming from. Sriracha on avocado toast? Sure! On a bagel and cream cheese? Yes please! There really is no limit with this stuff.

Good American Chinese food can be hard to come by which is why I’ve taken to making it at home. It’s not hard to make and it’s probably a bit healthier than what you’d get at a restaurant. It makes for a perfect, easy week day dinner. For this recipe I based it off the classic Sweet n’ Sour chicken I used to get when I’d order take out. It’s not tough to make but full disclosure–it can be a little time consuming in terms of the breading and frying. It’s worth it though, seriously. I love the balance of spicy, sweet flavors. Serve it with a side of rice and peas and you will be glad you didn’t call take out!

Print

Spicy Garlic Sriracha Chicken

An easy to make Chinese take-out style chicken slathered with a sweet and spicy Sriracha garlic sauce.

Course Main Course
Cuisine American, Chinese
Prep Time 10 minutes
Cook Time 25 minutes
Total Time 35 minutes
Servings 2
Calories 550 kcal

Ingredients

  • 1 1/2 tbsp Chili Garlic Sauce
  • 2 tsp Sriracha
  • 1/3 cup ketchup
  • 1 tbsp soy sauce
  • 1 tsp garlic powder
  • 1/3 cup granulated sugar
  • 1/4 cup rice vinegar
  • 1/2 tsp ginger powder
  • 1/4 cup water or more, depending on desired consistency
  • 2 chicken breasts boneless skinless, cut into bite sized pieces
  • 1/4 tsp pepper
  • 1/4 tsp salt or more to taste
  • 3/4 cup corn starch
  • 2 large eggs beaten in a small flat bowl
  • 1/2 cup canola oil
  • 1 cup brown or white rice
  • 1/2 cup green peas

Instructions

  1. Preheat the oven to 325F.

  2. Mix the chili garlic sauce, sriracha, ketchup, soy sauce, garlic powder, sugar, rice vinegar, ginger and water in a medium sized bowl. Taste and adjust according to desired taste.

  3. Place the chicken, corn starch, salt and pepper in a large ziploc bag and toss together.

  4. In a saute pan, heat the canola oil until hot but not smoking. Dip the chicken in the beaten egg and working in batches, fry for about 1-2 minutes on each side.

  5. Place the cooked chicken onto a cookie sheet lined with tin foil. Once all of the chicken has been cooked, spoon half of the sauce over the chicken.

  6. Cook the rice as directed on the package.

  7. Cook the chicken 12 minutes in the oven at 325F.

  8. Flip over and add the rest of the sauce. Cook for another 10 minutes.

  9. Stir the peas into the cooked rice and cook for about 1 minute. Serve alongside the chicken with extra soy sauce and sriracha if desired.

Save

Save

Save

Save

Strawberry Rhubarb Smash Cocktail

August 9, 2017 by The Partial Ingredients

I normally don’t post about cocktails but this one is such a perfect summer drink I had to share it. When farm stand strawberries are in their peak, this is a great way to take advantage of the bounty. You only need a few ingredients to whip this thing up but you do need a shaker to incorporate it all together. While I’m not a “mixologist” I do know that a good rule of thumb for cocktails is if it has a citrus component it should be shaken, not stirred! The mashing of the strawberries is a bit of a chore but it winds up being totally worth it. I’m not sure if this is standard for fruit based cocktails but I actually like to shake the ingredients twice during two different stages. The first stage is to get the strawberry and water well mixed together to create a juice just before straining out the pulp. The final shake comes at the end to get everything good and mixed together. The results are divine and make for a perfectly delicious, refreshing drink on hot summer days!

Print

Strawberry Rhubarb Smash Cocktail

Prep Time 5 minutes
Servings 1 Drink
Calories 275 kcal

Ingredients

  • 2 oz. vodka
  • 1 oz. simple syrup
  • 4 strawberries
  • 3 dashes rhubarb bitters I used Fee Brothers
  • 1 lime juice
  • 1 oz water or more depending on desired consistency
  • ice

Instructions

  1. In a metal shaker, add the strawberries and mash until the strawberries are smooth.

  2. Add a little water to the strawberries and add several ice cubes. Give the mixture a few good shakes.

  3. Strain into a cocktail glass, adding as much or little pulp as you like.

  4. Add the vodka, lime juice, simple syrup and rhubarb bitters to the glass.

  5. Add 5-6 new ice cubes to the shaker and pour in the mixture. Give it several good shakes. Strain out the ice or serve it on the rocks with fresh ice cubes.

Spiced Beef Fajita Tacos with Avocado Cream and Restaurant Style Salsa

May 3, 2017 by The Partial Ingredients

For Cinco de Mayo I wanted to showcase one of my favorite “food truck” style taco recipes. As you can probably tell by my post history I am a big fan of tacos. I wanted to incorporate my favorite part about fajitas–the seasoned peppers and onions–into a taco recipe. The beef is seasoned with a medley of spices that complements the bell peppers and caramelized onions. The salsa is a simple “restaurant style” recipe made with oven roasted tomatoes and blended with chilies, garlic and jalapenos. It also happens to be excellent with chips so have some of those handy for an appetizer! One of my latest favorite taco toppings has been avocado cream which sounds fancier than it is. While avocados are always perfect on their own, I sometimes like to mix them up a bit. All you need is a ripe, well mashed avocado, sour cream and lime juice. Mix together and there you have it–super easy!  Top this one with plenty of the salsa and lime juice. I used a finely shredded sharp cheddar to garnish but a crumbly queso fresco or white cheddar would be excellent as well.

…

Read More »

Cream Cheese Strawberry Banana Bread

March 27, 2017 by The Partial Ingredients

Who doesn’t love a big slice of banana bread and coffee for breakfast? I’m not even that into breakfast myself but this is probably my favorite. Simple, flavorful and easy to make ahead of time! The best part about the concept of banana bread is that it can be made as simple as you want or as fancy as you want. Occasionally I like to mix things up and add some different flavors. This time I had a few extra things lying around, namely some frozen strawberries and cream cheese. And of course some over-ripe bananas. As soon as my bananas start to turn I start thinking about the possibilities. Really what other food allows for that other than glorious bananas? It’s the only fruit whose possibilities open when they start to “go bad”… more like “go better” am I right? Frozen strawberries mash better than fresh so these worked out nicely, just thaw them out in a little warm water before using. You can definitely use fresh strawberries but they will show more in the batter. Mashed frozen strawberries will blend into the batter more than the former but the flavor will remain. If you want nice big red berries leftover after it’s cooked, you might want to mash less and use fresh instead.

The texture reminded me of pound cake but with a lot of moisture and richness. I’m guessing this was probably due to the cream cheese which added a little extra something to the flavor as well. The bread’s crust browned perfectly in the oven and didn’t get too dark. I cut back on the sugar on this one. You can always add about 1/2 cup more but I honestly liked it a little less sweet. As spring is getting underway this was a nice recipe to enjoy for this time of year.
…

Read More »

Slow Cooker Bison & Vegetable Soup

January 30, 2017 by The Partial Ingredients

I first tried ground bison with burgers a few years ago and I was blown away by how good they were. For those who haven’t tried bison meat, it is pretty much just like beef but better. Bison is leaner than beef and has a small amount of omega 3 fatty acids and complex nutrients. I think it tastes mostly like beef but with more flavor without being gamey at all. Even though it is considered a “game” meat the flavor is totally mind in my opinion.

Now onto the recipe: it turns out bison meat works great in both soups and burgers! While you can definitely substitute in beef I would recommend trying out bison for this one. This recipe also has some lovely veggie accompaniments: potatoes, cabbage and mushrooms give it some rustic hardiness perfect for winter. I used red wine to add more depth of flavor to the broth along with Worcestershire and herbs. Slow cooking does wonders for combining all of these flavors together. I garnished each bowl with shaved Parmesan but Romano or an aged cheddar would be delicious too!
…

Read More »

Take-Out Style Chinese Orange Chicken & Rice

October 4, 2016 by The Partial Ingredients

Take Out Style Chinese Orange Chicken

I never think to order take out Chinese food because I always just wind up making it from scratch. The reason for this is that I always have the ingredients lying around so I figure why not just make it myself? The recipe is easy to make and healthier than take out so there’s benefits to making it at home. The chicken is full of orangey, tangy flavor without being overly sweet. You can also customize a bit with the sweetness by reducing the sugar by about 1/4 cup. I love how tender the chicken winds up being when it’s made at home–there’s really no reason to pick up the take out! I plan on making this one a lot. I like to serve it with simple rice bowls with peas or veggies. You can also skip the rice and opt for more veggies for a lower carb version.
…

Read More »

  • Go to page 1
  • Go to page 2
  • Go to page 3
  • Go to Next Page »

Primary Sidebar

About Emily

I'm an analyst by day and part time blogger by night living in the Denver area. I'm into everyday style, traveling, soap making and playing drums/vocals in a band. I love spicy food, wide open spaces, beautiful colors and strong coffee. You'll find everyday fashion inspiration, tasty food recipes, and a smattering of whatever I'm into at the moment. Welcome!

Follow me on…

  • Bloglovin
  • Email
  • Instagram
  • Pinterest

Follow on Instagram

Follow on Instagram

Shop My Closet

Shop more of my closet on Poshmark

As Seen On

As Seen On

Archives

Categories

Copyright © 2026 · Foodie Pro Theme by Shay Bocks · Built on the Genesis Framework · Powered by WordPress